...
| Info |
|---|
|
- All fields are mandatoryobligatory.
- Double-check the e-mail address you have entered to avoid any typographical errors that will lead to lost messages.
- Click on the
 icon to display the password policy. icon to display the password policy. - Tick the Show password checkbox to display your password.
|
...
- Orders, shipping, payments
- European Pharmacopoeia
- Reference Standards
- CombistatsCombiStats
- CEP - Certificate Certificates of suitability
- OMCL Network
- HealthCare
- Events and public relations
- IT Technical support
- EDQM Quality Management
...
- click on the subtopic of interest
- a customised form is displayed, containing fields pertinent to the chosen subtopic
 Image Removed
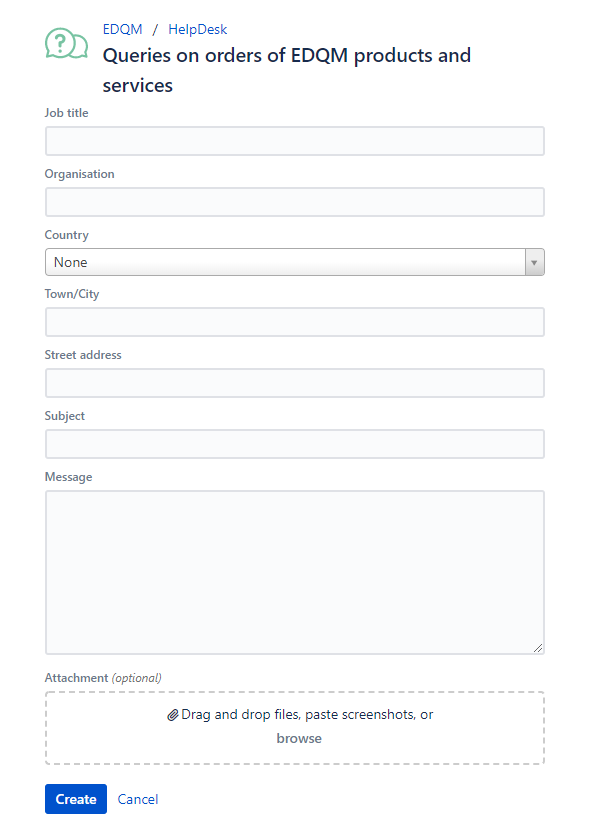 Image Added
- read the description at the top of the form if there is one
- in English or French, provide precise and concise information in each field (e.g. subject, message, organisation, summary, description) or choose a suitable option from the drop-down list (e.g. country, visitor profile)
- if needed, attach file(s) to your form in the Attachment field by dragging and dropping it/them, pasting screenshot(s) or browsing for files on your computer
- click on Create to submit your request
...
- click on the article that may contain the solution to your issue
- a pop-up will display the content of the article is displayed
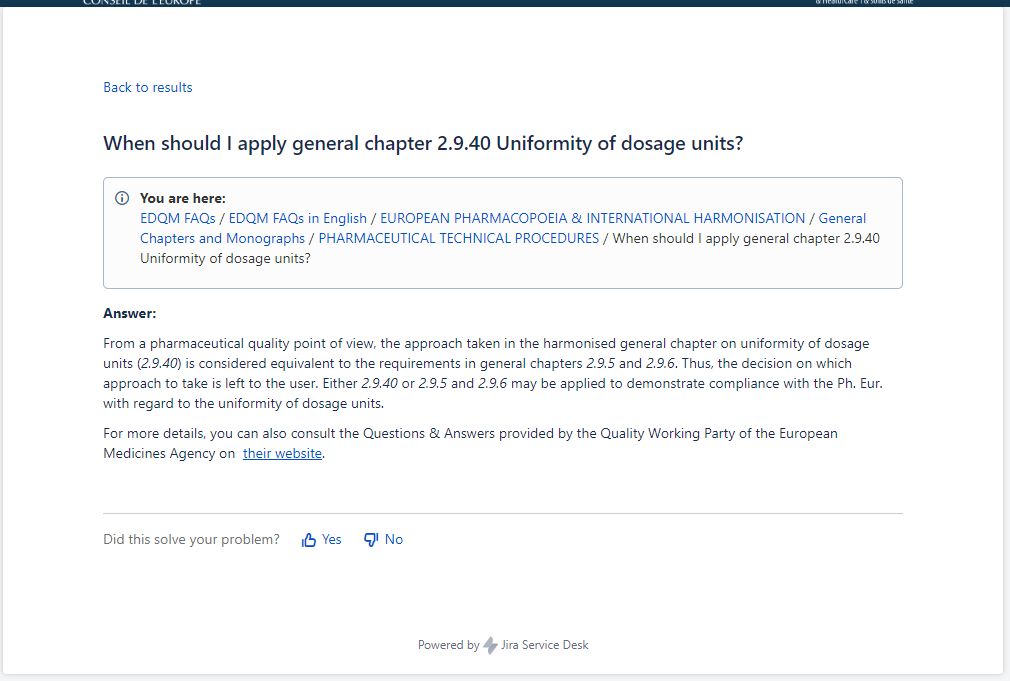 Image Modified
- if the article was helpful, click on
 at the bottom to provide feedback to the author and to the other users about its usefulness
 - if none of the proposed articles provided the answer to your question, click on
 in the top left corner and create your request
...
The fastest and easiest way to reply to a question raised by an the EDQM HelpDesk team member dealing with your request is to simply reply to the e-mail you received. Your response will be automatically added as a comment to your request on the portal. Any attachments joined to your e-mail will be saved in your request as the attachments to your comment.
You can also log on the HelpDesk portal and add a comment to your request.
...
- Request is created: When you submit a request through the HelpDesk portal, you will receive an e-mail notification confirming its receipt. This e-mail includes the reference number of your request (e.g. HELP-438), the View request link and the Turn off this request's notifications option. Your request will have
 status on the HelpDesk portal portal, which means that it is currently being examined by the EDQM HelpDesk team member in charge of this type of request.
...
- Comment is added: When the EDQM HelpDesk team member dealing with your request has added a comment, asking for more information, an e-mail notification is sent to you. Your request will have
 status on the HelpDesk portal. You can provide the answer to the EDQM HelpDesk team member handling your request by simply replying to the e-mail you received. Your response will be automatically added to your request as a comment. Alternatively, you can click on the View request link in the e-mail notification and enter your credentials if necessary to open your request. Then, add your response in the Comment on this request... field and click on Add to submit your reply. Your request will change back to status on the HelpDesk portal.
 - Request is resolved: When your request is resolved, you will receive an e-mail notification. Your request will have
 status on the HelpDesk portal.
 - Request is reopened: When the an EDQM HelpDesk team member reopens the request, i.e. when the resolution of your request turns out to be inadequate and/or incomplete, an e-mail notification is sent to you. Your request will again have status on the HelpDesk portal.
...
- click on the Edit your profile option
- click on Change avatar to change your profile picture
- Upload avatar by dragging and dropping the image in JPG, GIF, BMP or PNG format or Select Image by browsing for files on your computer
- click on Done
- click in the box containing the Name you previously registered to change it
 Image Modified
- select your Language of preference from the drop-down list offering the choice of more than 20 languages. N.B. The language change will be applied to the tool's inbuilt features, whereas the options specific to the EDQM HelpDesk will continue being available in English only.
- from the drop-down list, select the Time zone you are currently in
- click on Save
...
 EDQM FAQs
